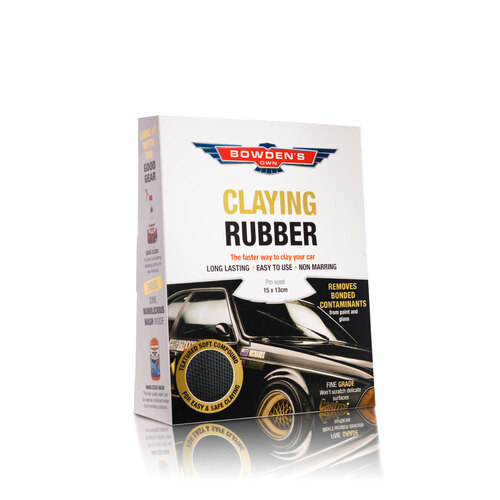
Claying Rubber - a new generation of clay technology
One of the first steps to shiny paint is to return it to a nice and smooth finish, free from any bonded contaminants. Claying Rubber is a new amazing form of rubber technology that we've found to be the easiest, fastest and most effective way to remove these bonded contaminants in one simple step. Using this will make your paint shiner, as well as making the paint cleanser, waxes and sealant products easier to use, give a great shine and protect at their very best.

Key points for Claying Rubber:
- Brings back the smooth as glass, new paint feel.
- Safely removes bonded particles that make your paint feel rough.
- Super fine grade specialised rubber, it's the latest technology that won't create micro-scratches or mark your paint.
- Lasts longer than traditional clay bars, and is easier to use.
- If it's dropped, it doesn't have to be thrown away, just wipe the rubber surface with water and suds.
- Foam backing to reduce finger pressure points and works better on your cars contours and curves.
- Great for use on glass, mirrors, gel coat and chrome.
- Can do over 25+ cars, depending on the level of contamination.
We have three different ways you can use the Claying Rubber, depending on what best suits you. You can use it with our lubricating car washes outside, or use it inside with a lubricating detailing spray. Our final way is as a total decontamination tool with our Three Way spray to remove embdeded iron, old waxes and sealants and bonded contamination. Read more below on these different techniques.
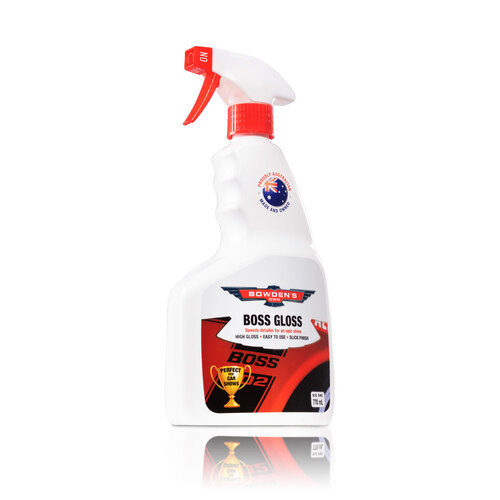
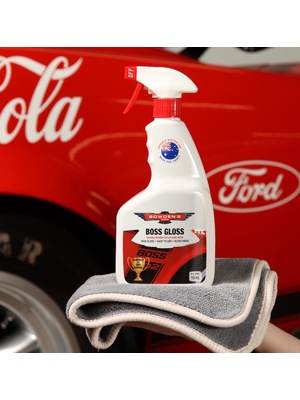
With Boss Gloss method (indoors)
This method is how you would traditionally use a Clay Bar with the detailing spray as the lubricant. It can take a little bit extra time as you need to buff each area as you go, but it will suit a lot of people who prefer using the product this way.
Step 1:
Make sure the car is totally clean, whether you wash and dry the car or wipe it down safely beforehand. Also make sure the car is in the shade and the paint is cool to touch.
Step 2:
Work on one panel, or half a panel at a time. Spray Boss Gloss liberally onto the surface and also add a few sprays into the Claying Rubber. GENTLY apply to the surface in straight lines; up and down, then side to side. Never use it on any area that is dry, always keep the section you're working on well lubricated.
Step 3:
You will feel the Claying Rubber working as the surface turns from rough to smooth. Once the surface is completely smooth, wipe the section down with a clean and dry Drop Bear or Big Softie cloth. Repeat this process until the entire car is done.
Step 4:
For the best possible finish, follow this up with our Paint Cleanse & Restore and then seal it to increase the shine with our other waxes and spray sealants.
You may notice that the rubber surface will feel slightly more tacky after use, this is normal and part of the trick of how this rubber works. When new it has a powder on the surface to stop it sticking to the packaging, with this gone the now sticky surface can easily grab onto the bonded contaminants and be more effective at safely removing them from the surface.

The Wash suds method (outdoors)
A great and time saving way to use the Claying Rubber is with our car washes, as they are all super lubricating.
Step 1:
Work in the shade, or early in the morning or late in the afternoon. Wash your car using Nanolicious Wash, Wax Wash, or Auto Body Gel, then rinse it thoroughly.
Step 2:
Create a separate and new lubricating suds solution by adding two capfuls of one of our washes into around 5-8L of water and frothing it up.
Step 3:
Work on small areas at a time, like 1/4 of a bonnet, or 1/2 of the roof or boot. Get heaps of suds onto the car with one of our safe microfibre wash tools like our Wash Pillow or Shagamittastic Wash Mitt. Dip it and the Claying Rubber into the suds solution. Take the suds to the car and squeeze them all over the section you're about to clay. You want to really make sure the surface area is wet with the lubricating suds.
Step 4:
With your hand on the foam backing part of the Claying Rubber, apply it to the surface GENTLY, with no pressure at all. Go in straight lines; up and down, back and forth, until the pad runs back and forth nice and smooth, with no resistance.
Step 5:
Rinse the section off. Then do the rest of the car using the same method. Keep the car wet as you go, or dry each section when you're done to avoid water spots.
You may notice that the rubber surface will feel slightly more tacky after use, this is normal and part of the trick of how this rubber works. When new it has a powder on the surface to stop it sticking to the packaging, with this gone the now sticky surface can easily grab onto the bonded contaminants and be more effective at safely removing them from the surface.

The Three Way method, for a total decontamination (outdoors)
Using the Claying Rubber with Three Way is our ultimate way for decontaminating your car nice and easy, in the shortest possible time.
Step 1:
Wash and dry the vehicle safely. We recommend to wash with one of our lubricating washes; Nanolicious Wash, Wax Wash or Auto Body Gel using one of our safe microfibre wash tools like our Wash Pillow or Shagamittastic Wash Mitt. We recommend to use a double solution of your favourite wash to make sure you're getting rid of as much dirt, oils and grease as possible. After you've washed the vehicle, dry it safely with The Big Green Sucker. Don't use any Boss Gloss or other detailing sprays on your Big Green Sucker during this drying process, as it can affect the next steps, and it'll also be a waste of product!
Step 2:
Make sure the vehicle you're decontaminating is in the shade and the paint is cool to touch. A well-ventilated area outside in the shade is ideal. Wear some gloves, although the product doesn't smell of death, the gloves will make sure that your hands don't smell afterwards. If your skin is susceptible to detergents and drying out, this will stop it happening as well.
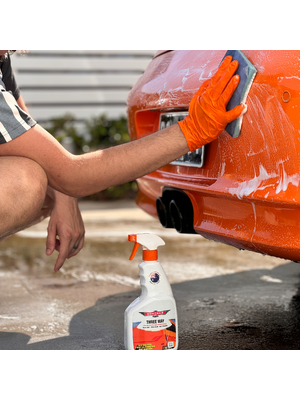
Spray Three Way directly onto a panel, or half a panel depending on how big the area is. Do this one section at a time and allow one minute for the purple reaction to begin. This reaction is the ingredients in Three Way reacting with the iron particles on your paint, and safely breaking them down into a water soluble solution. With these particles now broken down, they will not scratch or mark your paint under the Claying Rubber.
Step 3:
Spray a few sprays of Three Way into the Claying Rubber and GENTLY apply to the paint in straight lines over the lubricated area (DO NOT USE ON AN UNLUBRICATED AREA). You will feel the surface go from rough to smooth as the rubber polymer removes the bonded contamination from your paint. Once the paint is smooth, you know you're done and you can move onto the next section.
Apply more product as needed to keep each section well lubricated. You will notice as you work the product more, it will start to lather up. This is really deep cleaning the paint surface and removing the waxes and sealants. If the Claying Rubber becomes full of contamination (you will hear it sounding rough and not clearing up), then it's time to give it a rinse. Rinse it out in fresh, clean water, and then go right back to claying.
Step 4:
Wait another one minute for any further iron reaction (the product will keep reacting with any iron particles present during this whole process), then rinse the area thoroughly with water.
Repeat this same method on all the remaining panels, making sure to rinse the Claying Rubber as you go to remove the contamination from the surface. Do this until the entire vehicle is done.
Step 5:
Wash and dry the vehicle again safely to remove any remaining residue left over from the claying process.
If your vehicle has extremely bad iron contamination, you may need to repeat this process.
You will notice that the rubber surface will feel slightly more tacky after use, this is normal and part of the trick of how this rubber works. When new it has a powder on the surface to stop it sticking to the packaging, with this gone the now sticky surface can easily grab onto the bonded contaminants and be more effective at safely removing them from the surface.

Cleaning after use and storage instructions
After use, rinse the Claying Rubber out in fresh water thoroughly. Be sure to run water on both sides of the pad and through the foam section in the middle as well. DO NOT WRING IT OUT, SCRUNCH IT, OR ALLOW THE RUBBER TO TOUCH THE RUBBER as it will stick together and affect the rubber polymer surface if pulled apart too agressively. Run the side of your hand across the foam section to help remove as much water as possible. A nice little tip is to run the foam backing over the edge of a contoured sink, with your hand putting pressure on the rubber face to push the water out from the foam.
Now leave it to dry. We find placing an old microfibre cloth under the Claying Rubber on its foam side will help absorb residual water from it as it dries. Leave it for a few hours, even overnight, till it feels totally dry.
Once dry, store it in a sealed food container (the one in the image is a Decor brand Aussie made one), with the rubber side facing up, or in a spot that the rubber won't come into contact with another item, as it will stick to it. DO NOT store the pad in a plastic bag for this very reason.
Keep it in a cool spot, out of direct sunlight.

Any Questions?
The Claying Rubber is a great, time saving addition to your regular detailing regime, making it fast, easy and even fun!
You can find it at our supporting autObarn, Supercheap Auto and Repco stores, plus other independent resellers as well. Part numbers to quote them (if it's not already on the shelf) is BOFCRBIG.
If there's any other questions you may have about this process that's not covered in this article or the videos, please feel free to contact me and my great team via email info@bowdensown.com.au or call us on 1800 351 308.
Love your car,
Dan Bowden


